In 2020, nearly 96% of Canada's population had access to online services, and the average Canadian spent over 40 hours a week online. With more than 30 million internet users in Canada, it's not surprising that there is a growing demand for internet services from both businesses and rural areas. As demand continues to increase, the need for high-speed internet services and VoIP is also expected to rise.
Netwire Fiber IPTV: Roku Box Self-Installation Guide
06.09.2022
Netwire Inc.
Roku Setup in a Flash!
Thank you for enrolling in Netwire Fiber’s IPTV service.
This step-by-step guide will help you through the installation of your Roku box to set up and configure your Netwire Fiber IPTV service.
Step 1. Connect your Roku player to the TV by connecting the unit to the TV's HDMI port. Note the HDMI port number. Most HD televisions should have at least one HDMI port.
Step 2. Plug Roku into a power supply (your TV's USB port or a wall socket). The device has a micro-USB port and a USB power cable included.
Step 3. Insert the two AAA batteries (included) in the remote control.
Step 4. Turn on your TV and switch to the correct HDMI input.
Set Up Your Roku Player
After a few seconds, the Roku setup should appear on the screen. Follow the on-screen instructions.
Step 1. Choose the desired language and press OK.
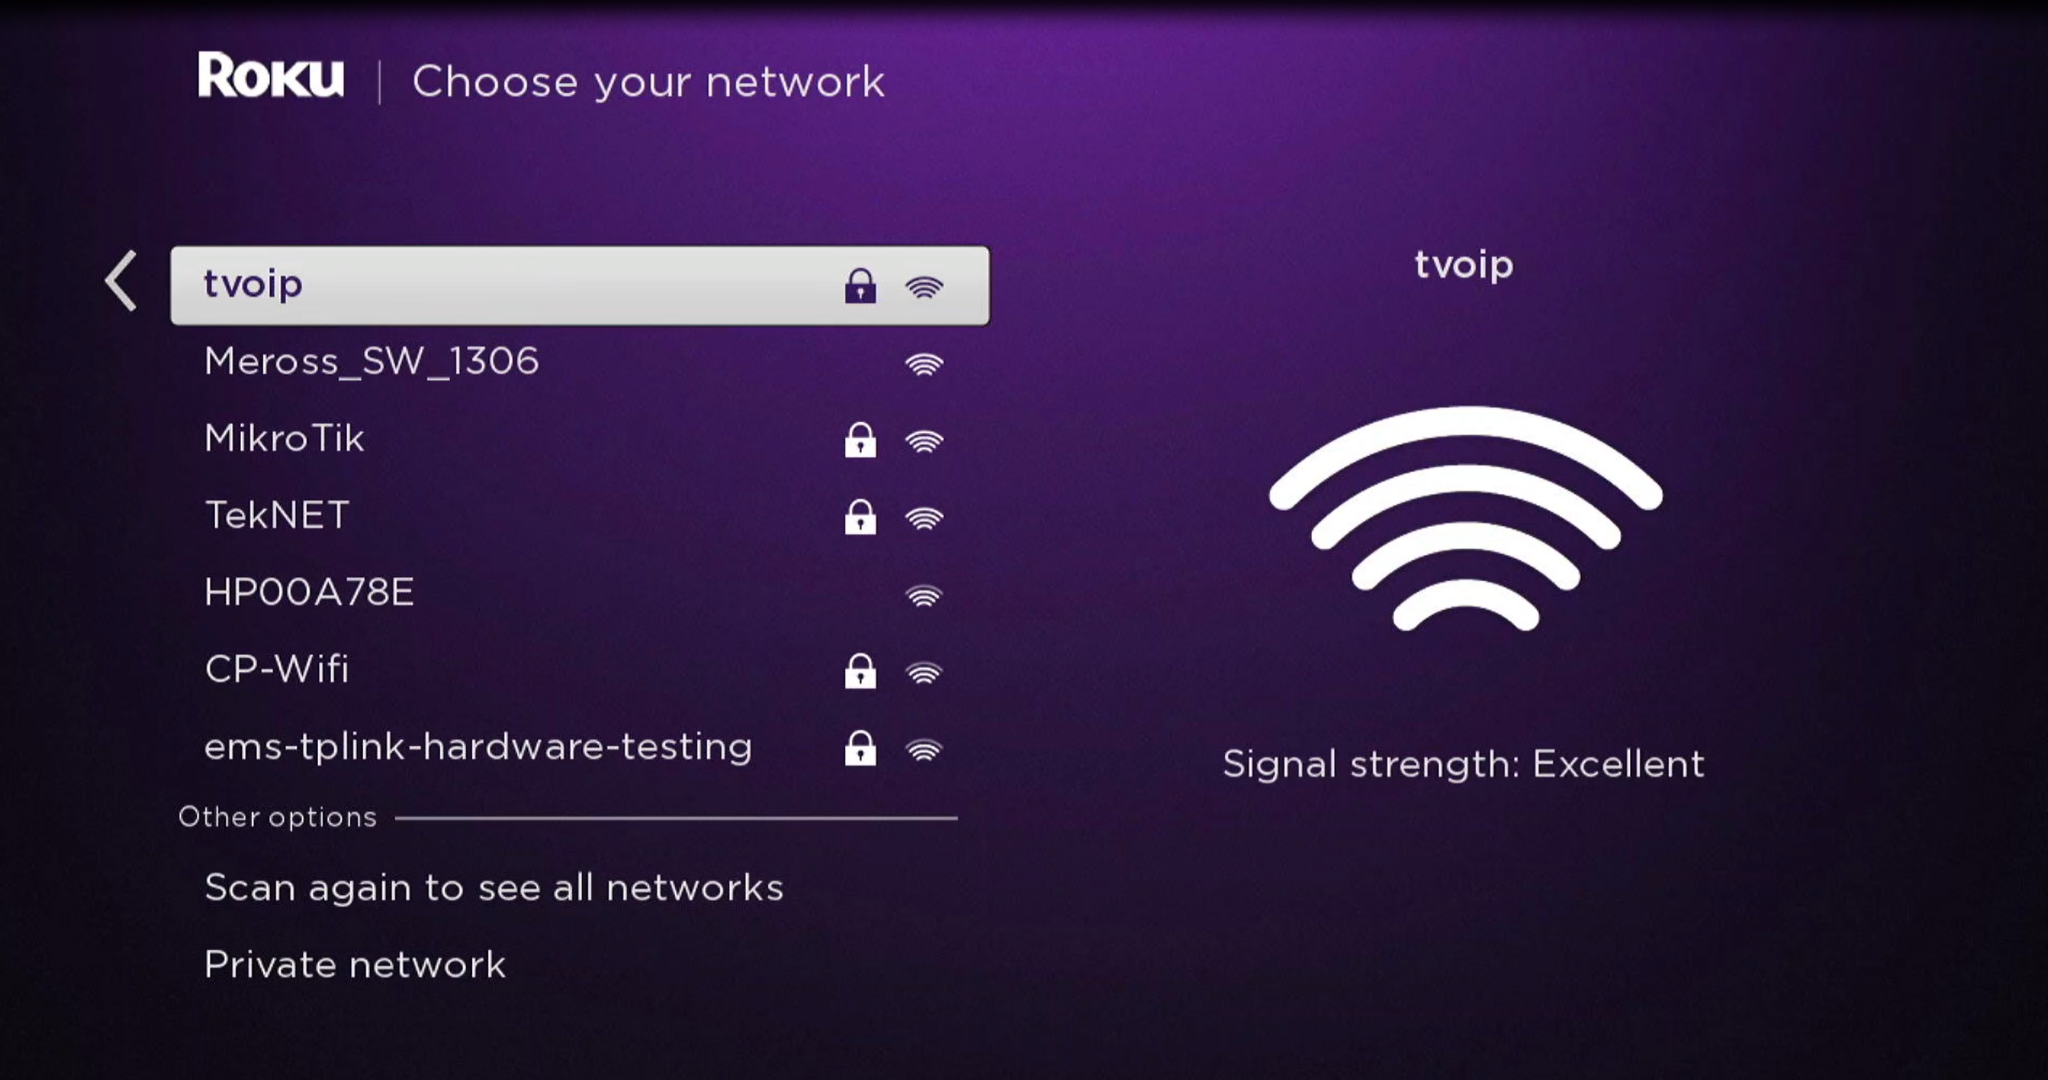
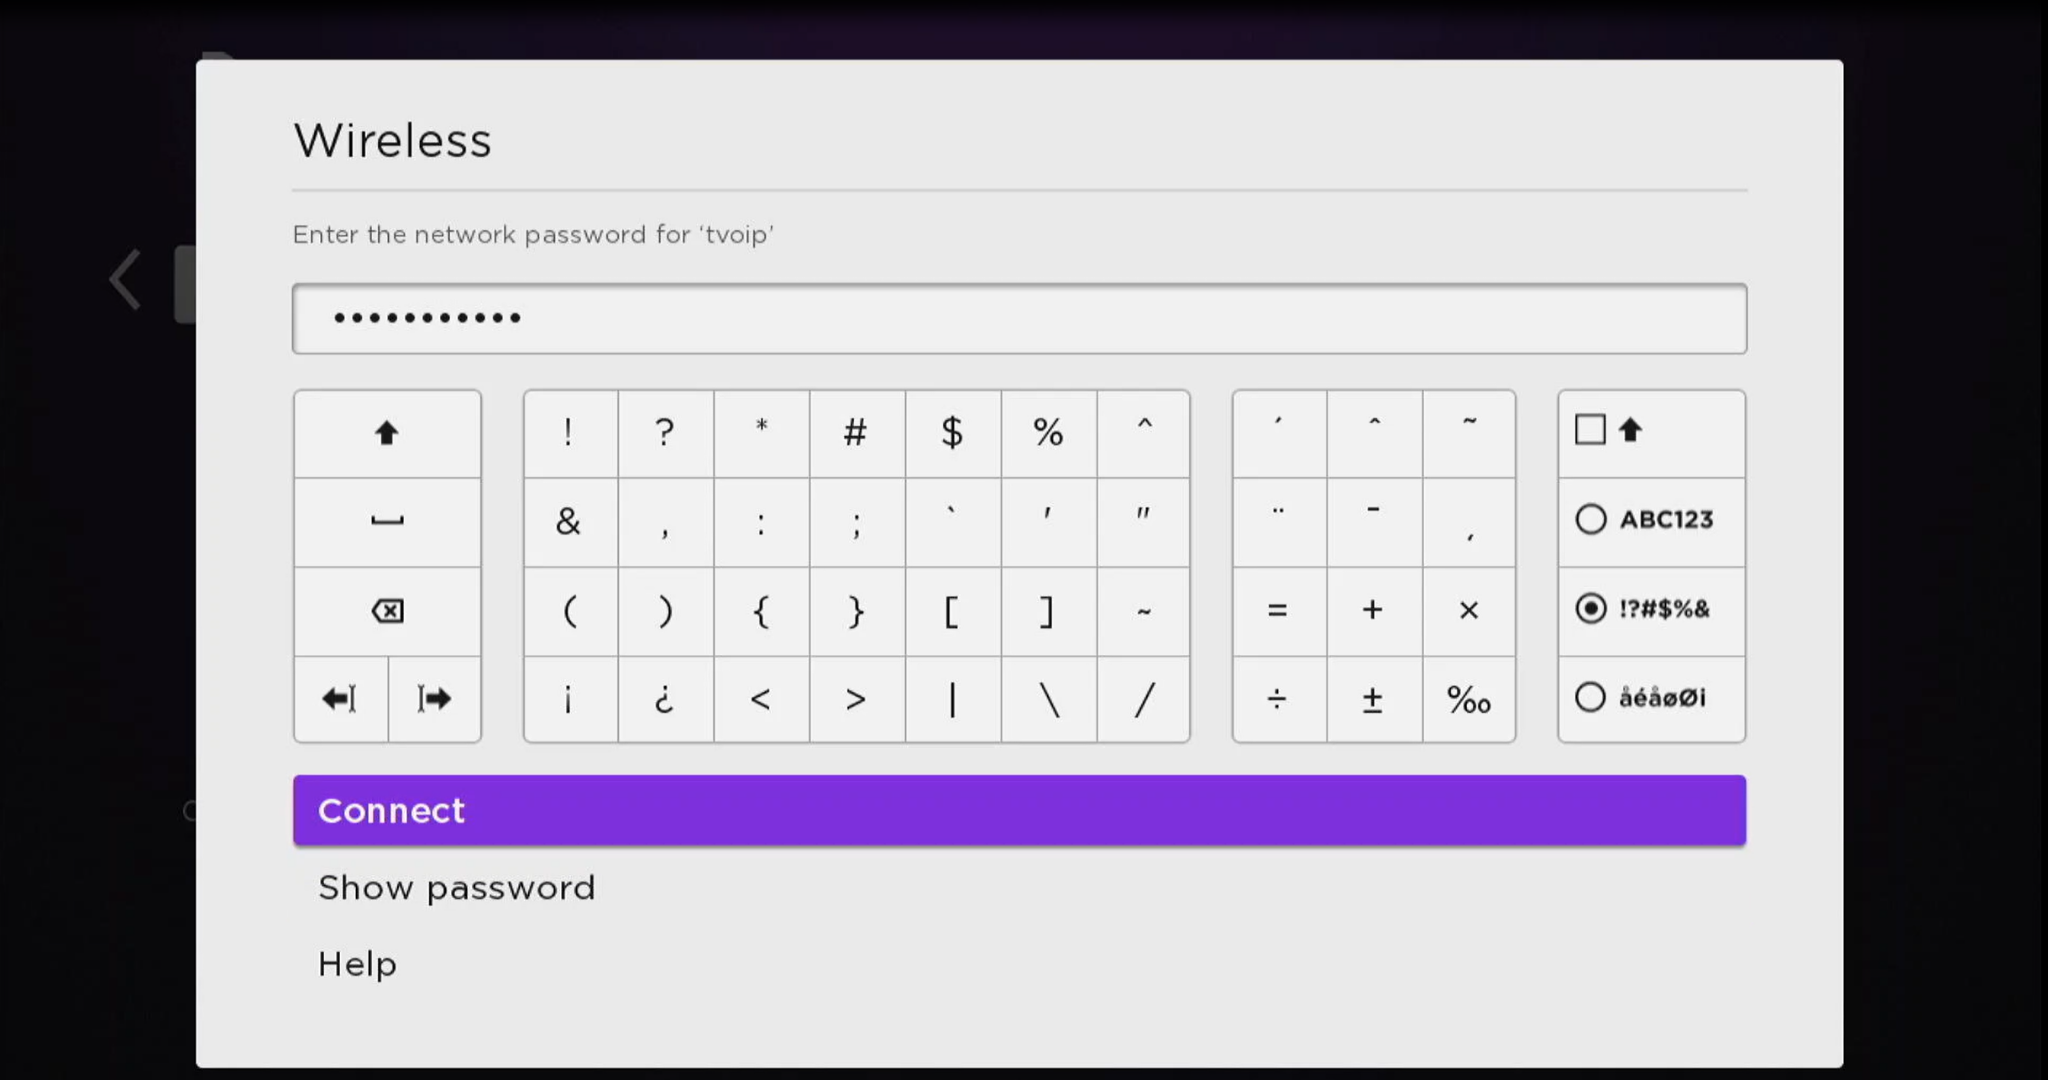
Step 2. Here, you need to connect to a wireless network. Select your Netwire Fiber wireless network using the Up or Down arrows on your remote and then pressing OK. Next, enter the wireless password via the on-screen keyboard and press OK (wireless keys/passwords are case sensitive).
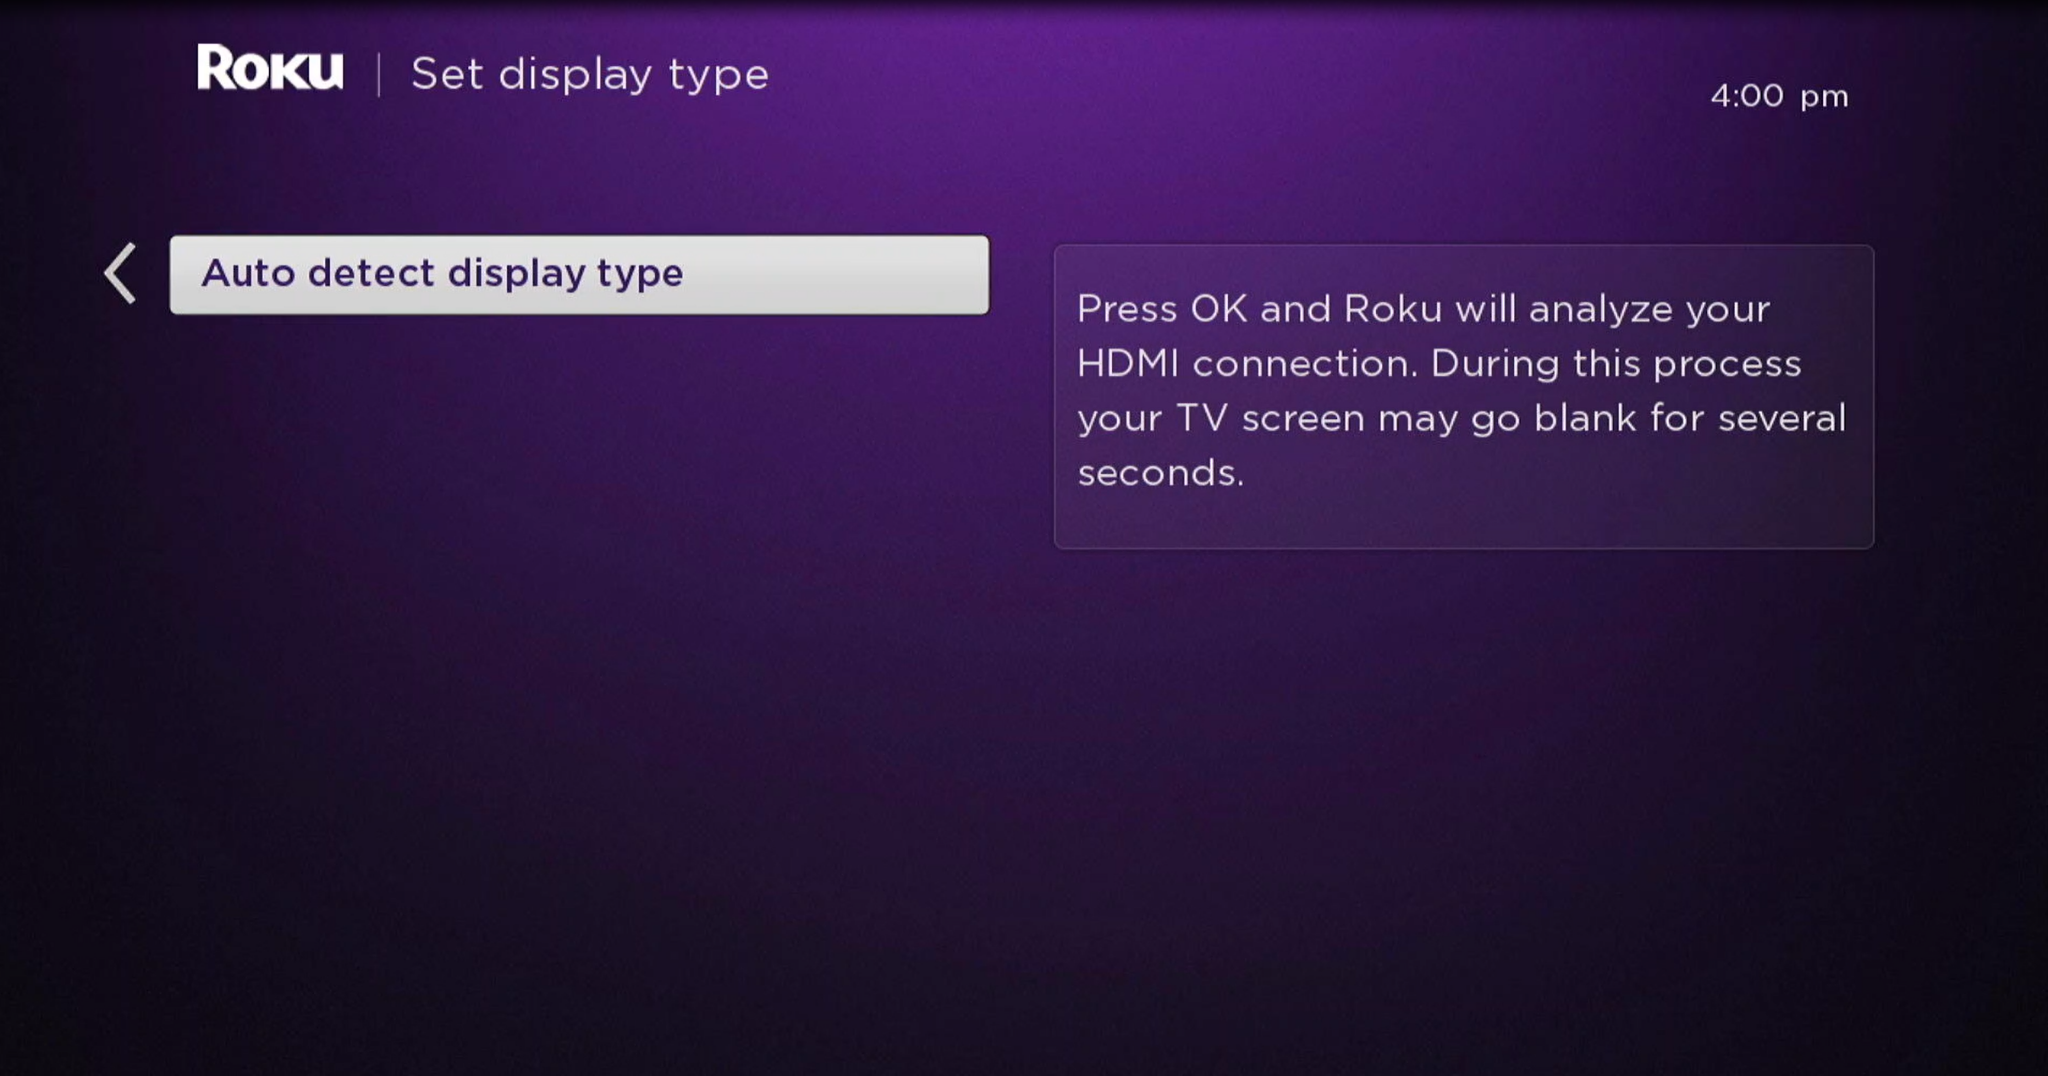
Step 3. Highlight “Auto detect display type” and press OK.
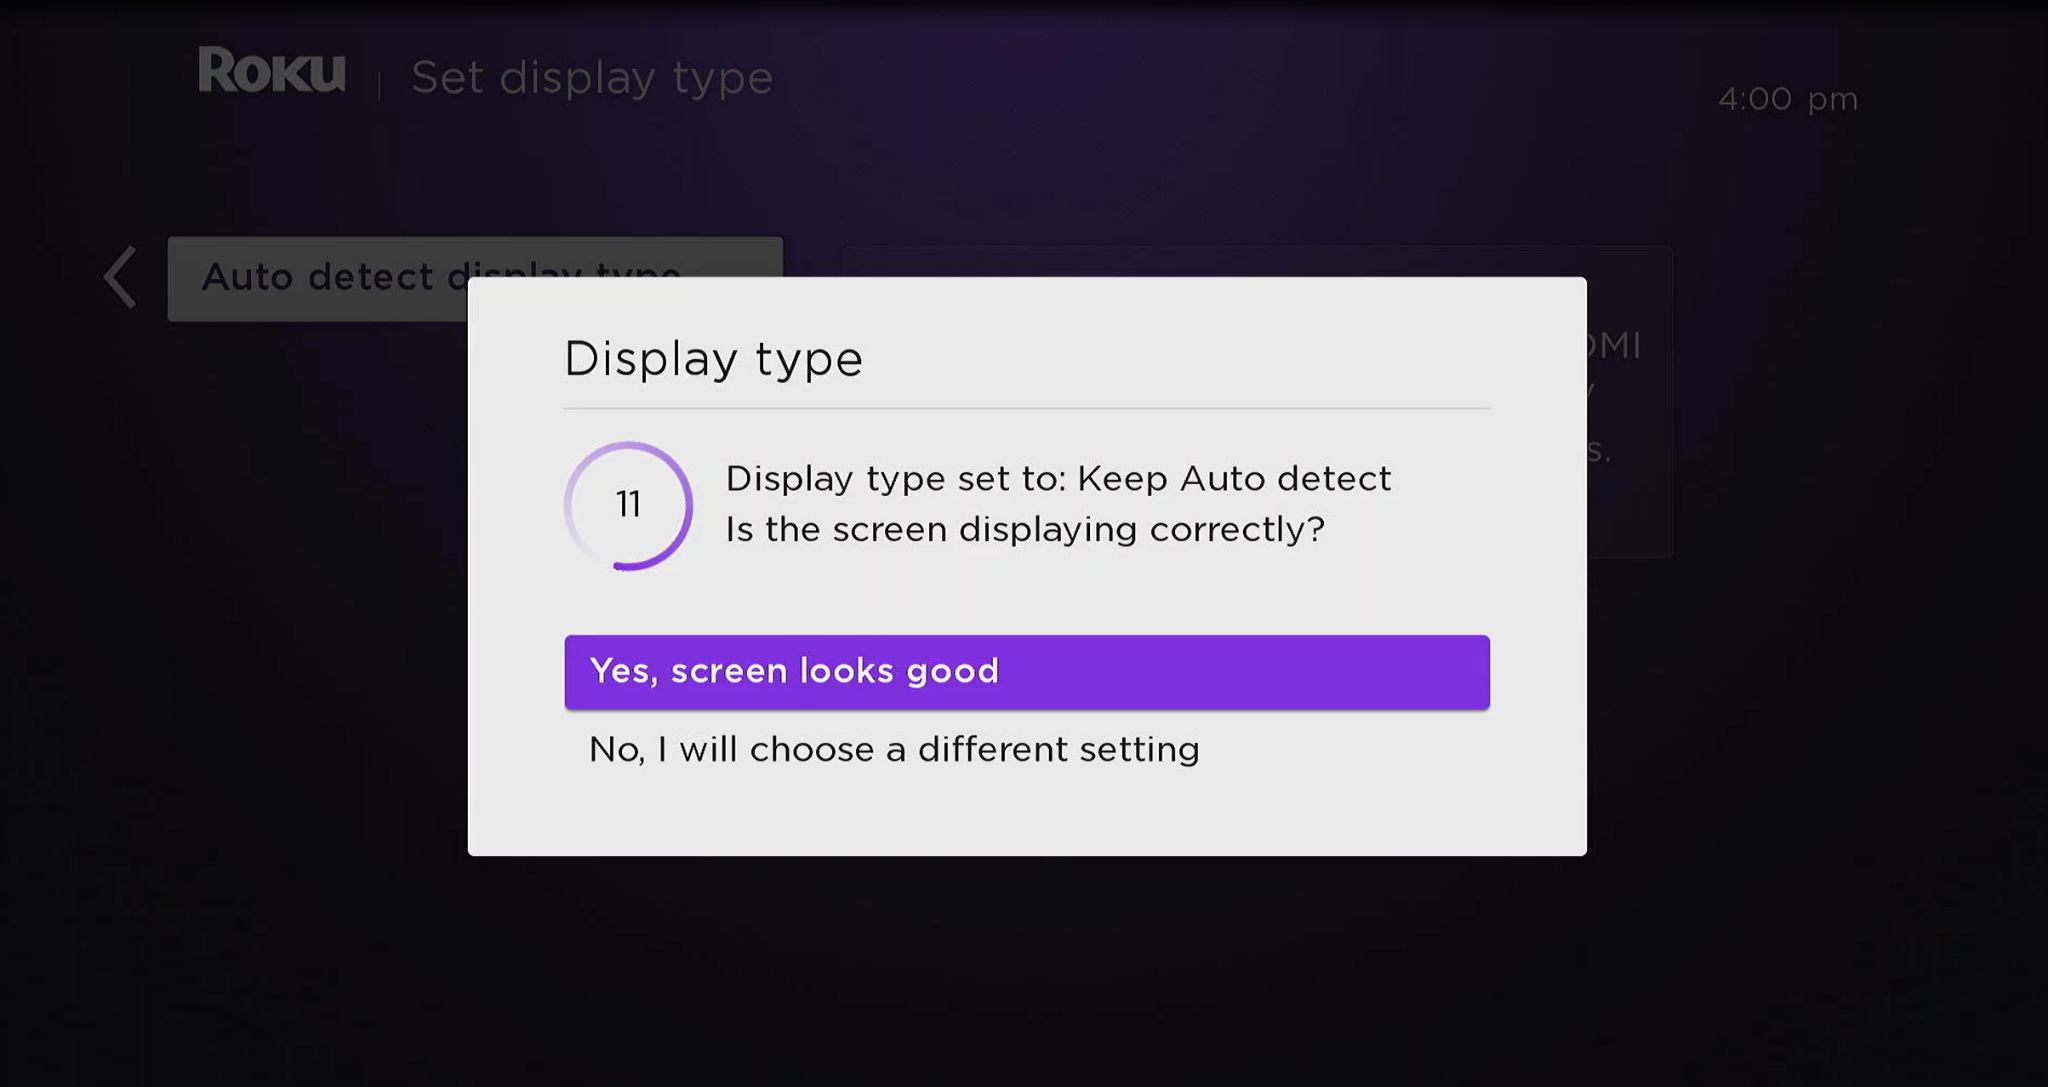
Your player will analyze the HDMI connection and select the most suitable video setting. Once the HDMI connection check is complete, highlight “Yes, screen looks good” and press OK.
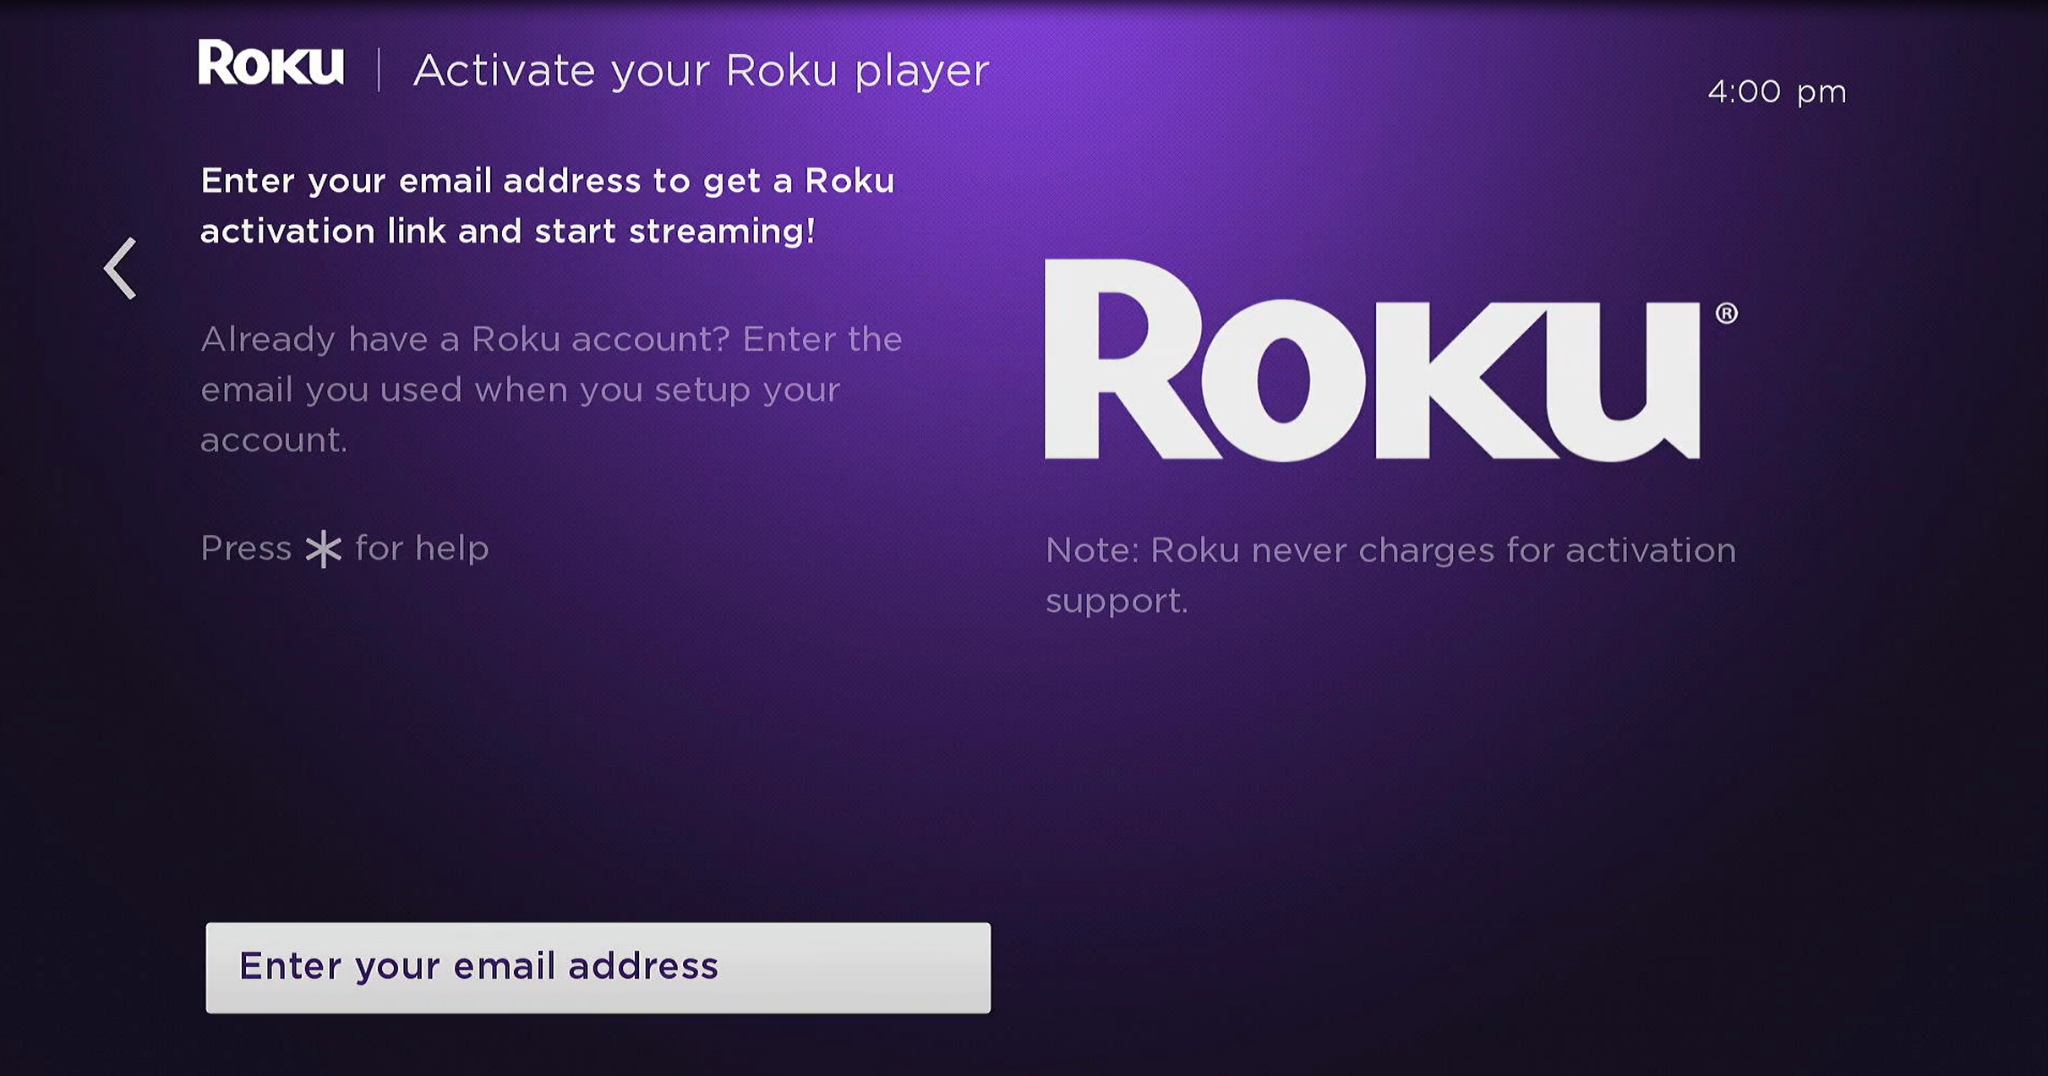
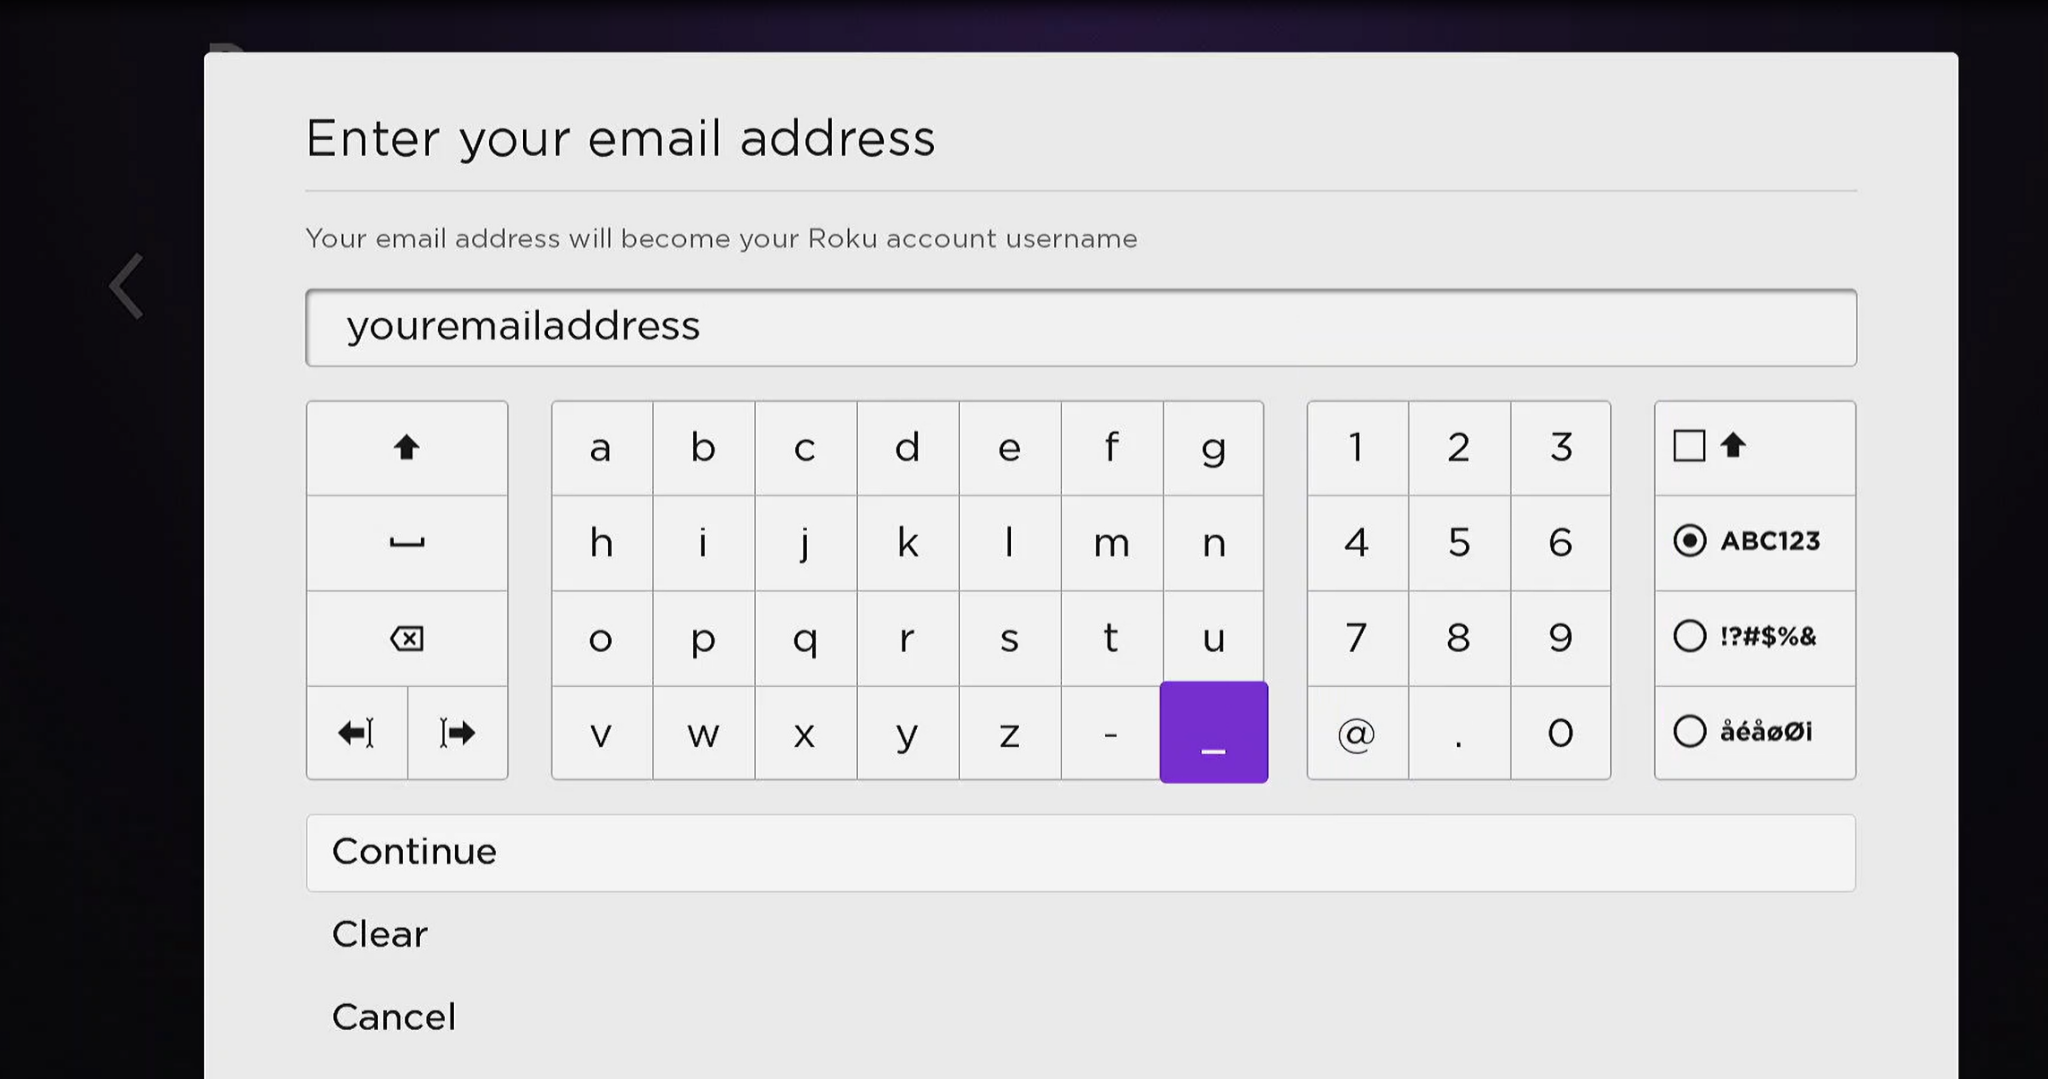
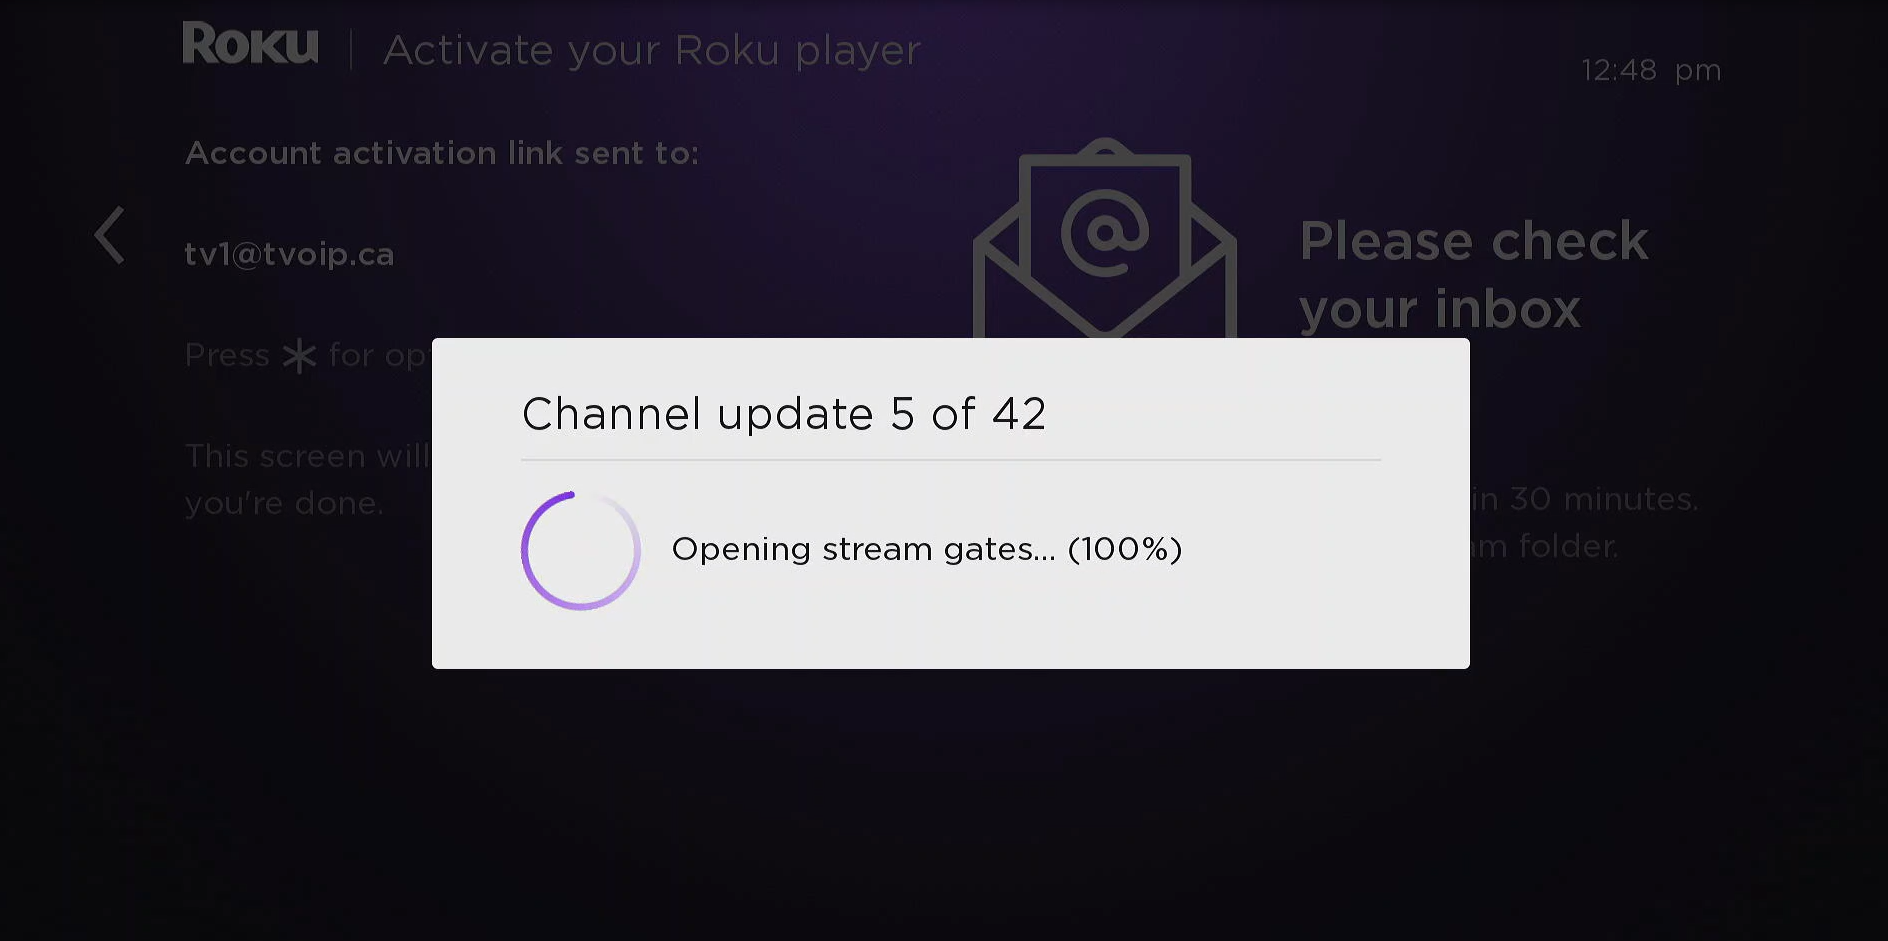
Step 4. To activate your Roku unit, the device must be synced with a Roku account. When prompted on the screen, highlight “Enter your email address” and press OK. Enter your email address to create your account. Roku will send an activation link to your email within a few minutes.
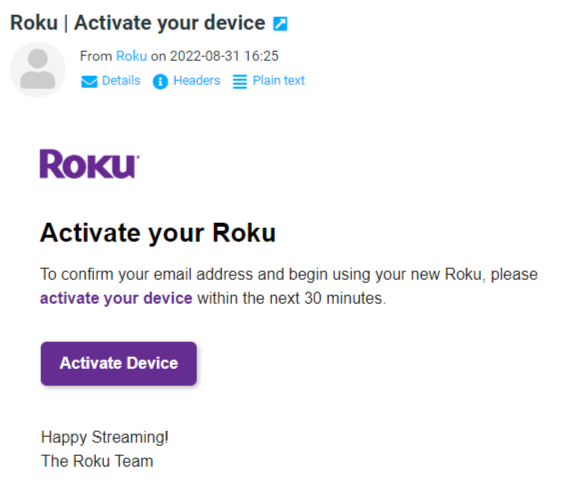
Activate your Roku device via computer or smartphone. It may take a few minutes to receive the activation email.
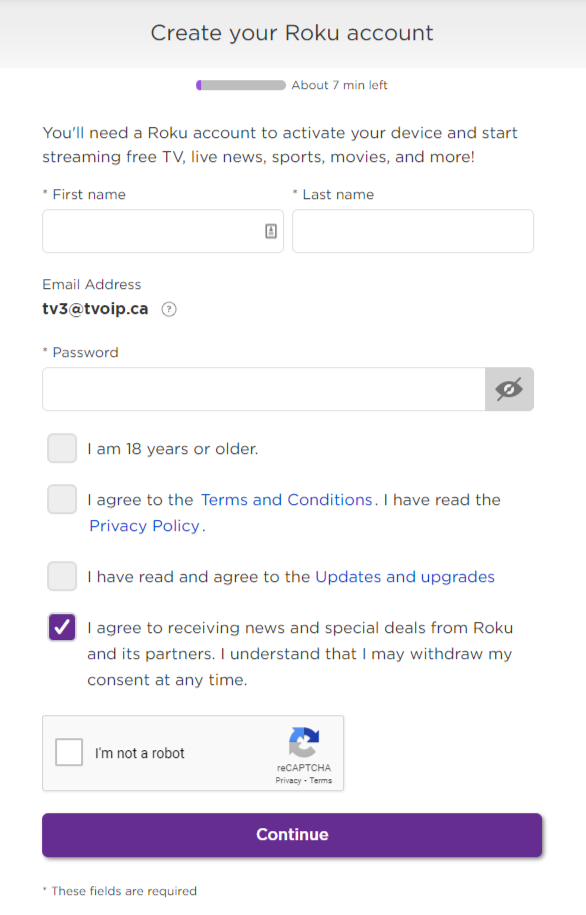
Step 5. Click on “Activate Device”, enter the requested information, and click on “Continue”.
Step 6. To complete the activation of your account, Roku requires you to enter your billing information. Bear in mind that there is no charge for creating a Roku account.
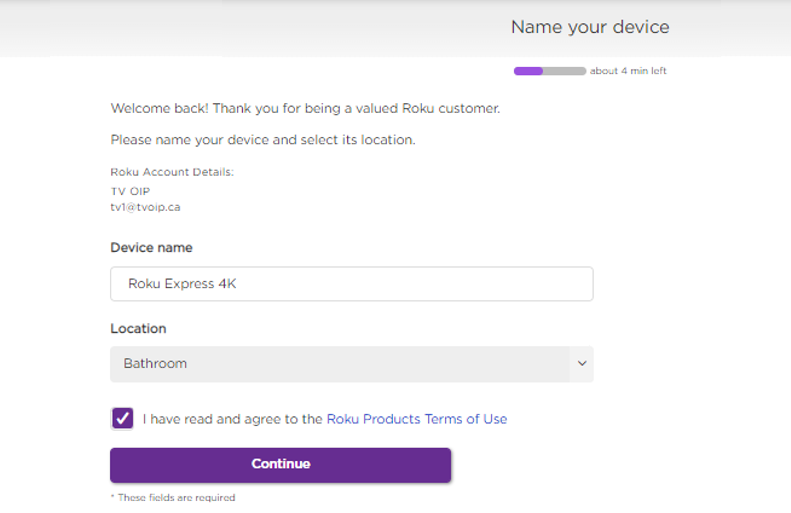
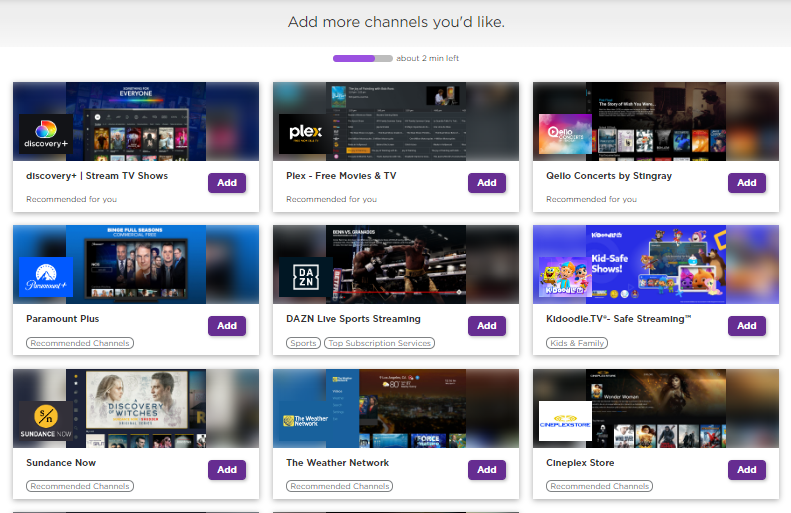
Step 7. Customize your Roku device and set Device name and Location. Optionally, you can add extra channels (Apps) to your Roku unit and click on Continue.
Roku will finalize the setup and download all additional channels.
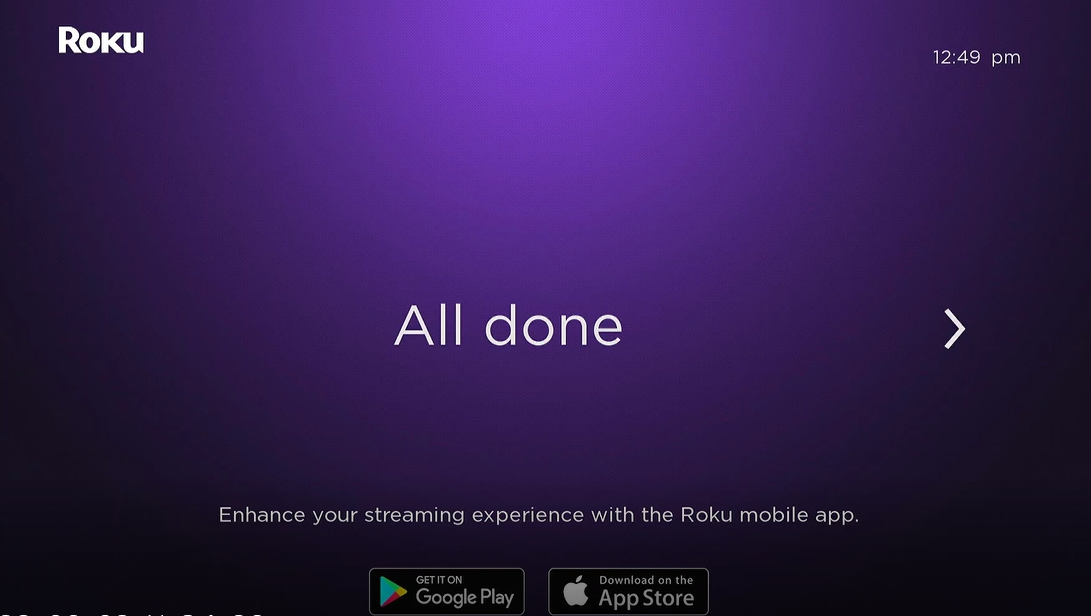
Step 8. Once the setup is complete, press the Home button on your Roku remote.
Adding TV Channels
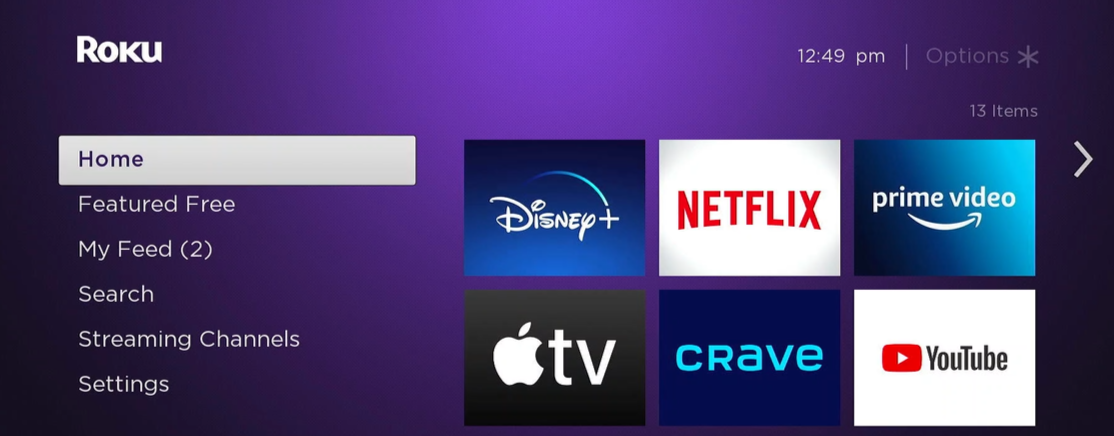
Step 1. Press the Home button on your Roku remote control.
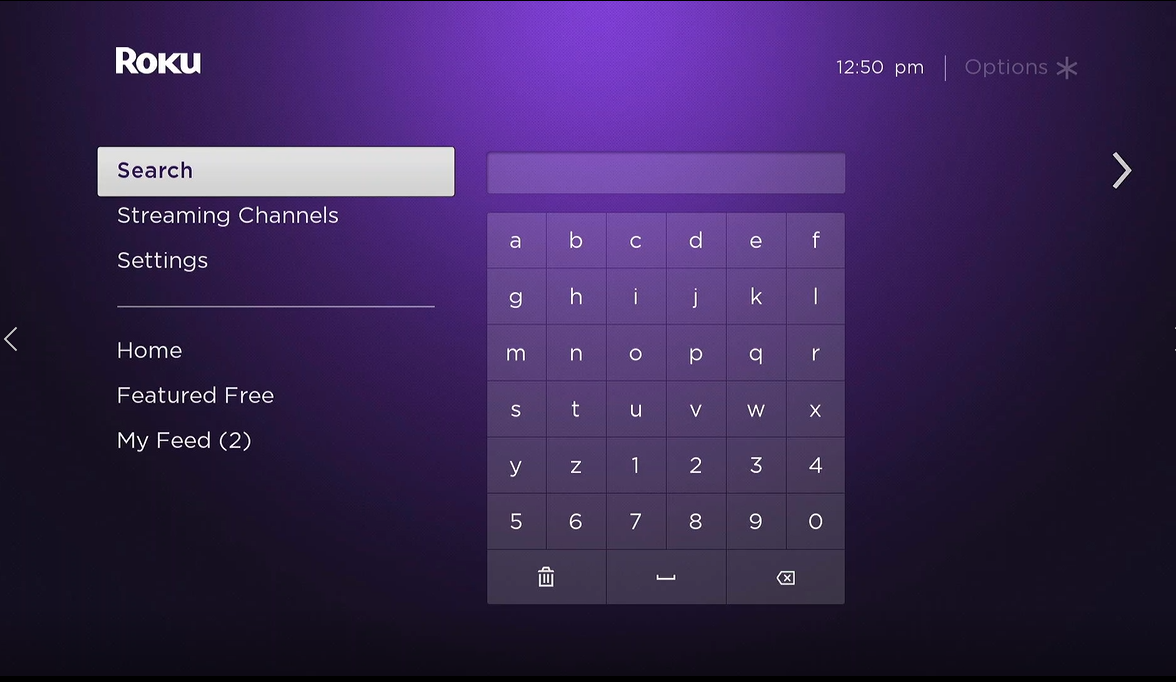
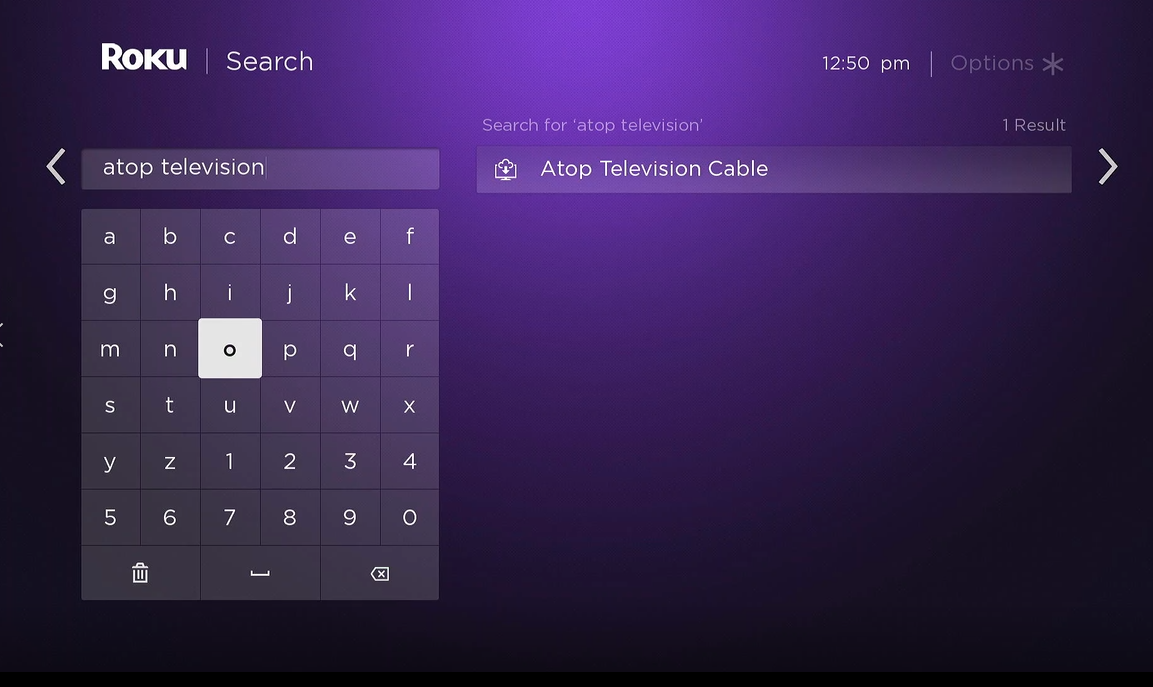
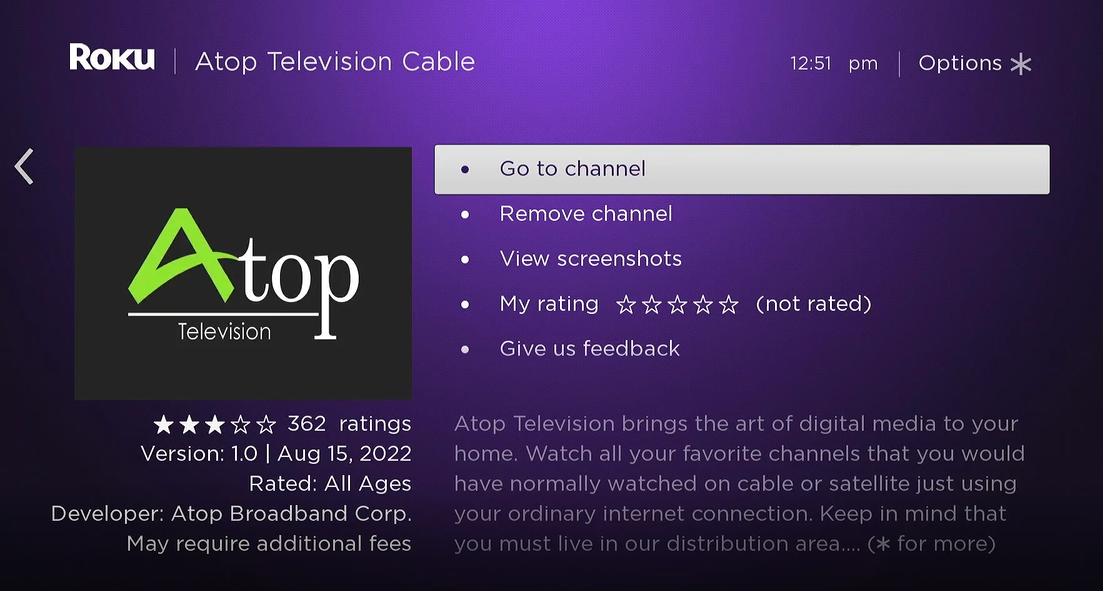
Step 2. Scroll down and highlight “Search”. Next, search for ”‘Atop Television Cable.” Then, highlight the app and press OK.
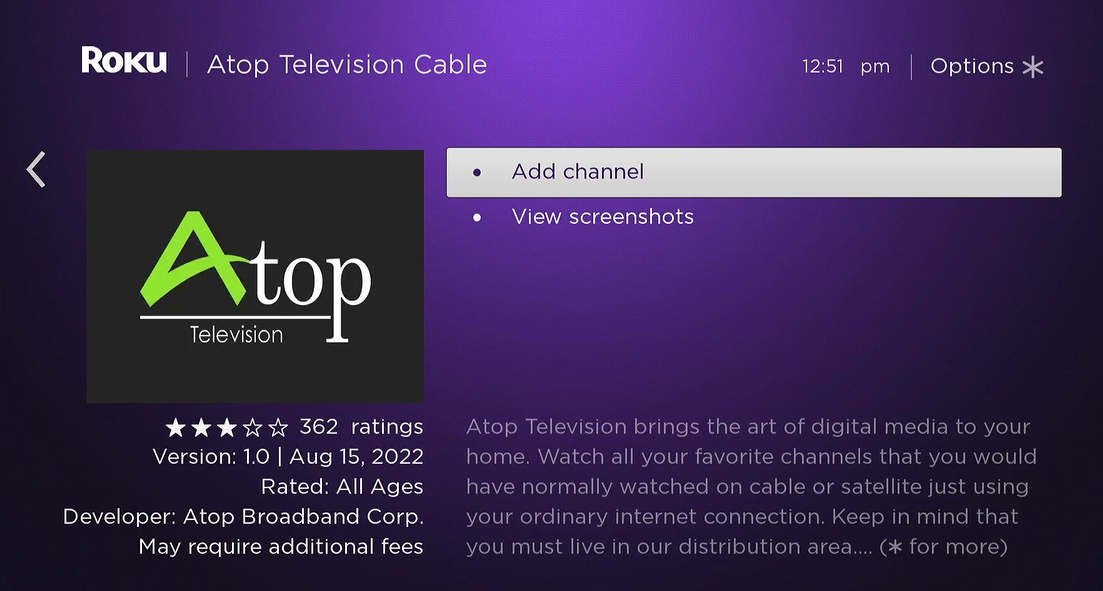
Step 3. Highlight “Add Channel” and press OK.
Once the Atop channel is added, highlight the app and press OK.
Step 4. Using the on-screen keyboard, enter your email and password (found on your service delivery email). Then, highlight “SIGN IN” and press OK. Note that the email address you enter on this form must be the same address you previously entered for your Netwire Fiber portal registration.
Step 5. After a few moments, your Roku device receives the list of the TV channels available with your package.
Need Help?
For any questions concerning our services or to schedule an appointment with one of our specialists, contact us today. We’re here to help!